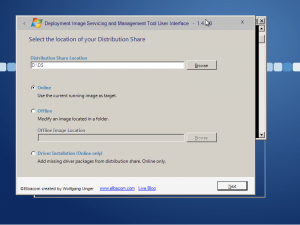
DISMUI kann als einfach zu bedienender Ersatz für die DISM-Kommandozeile verwendet werden. Seit Version 1.4.1 unterstützt DISMUI auch POSReady 7.
Warum sollte ich DISMUI anstelle von DISM verwenden?
- DISMUI kümmert sich um Abhängigkeiten, d.h. wenn Sie eine neue Funktion hinzufügen, wird DISMUI automatisch auch andere benötigte Funktionspakete einbinden.
- DISMUI prüft auf Konflikte, was bedeutet, dass Sie Ihr Bild nicht zerstören können, indem Sie eine Komponente hinzufügen, die mit einer anderen in Konflikt steht.
- DISMUI prüft die Mindestanforderungen an das Image, was bedeutet, dass Sie keine Funktionen entfernen können, die vom System benötigt werden.
- DISMUI wendet installierte Sprachpakete automatisch wieder an. Dies ist nach jeder Änderung erforderlich - sonst könnten Sie eine Anwendung hinzufügen, die keine Sprachstrings enthält und daher keine Texte anzeigt!
DISMUI verwenden
Um Ihr POSReady 7-Image zu ändern, legen Sie einfach die POSReady 7-DVD mit dem Distribution Share (DS) ein und starten DISMUI.
Das Tool zeigt Ihnen sofort, welche Funktionen derzeit auf dem System installiert sind.
Wenn Sie eine Funktion deaktivieren, wird sie aus dem System entfernt.
Hinzufügen von Feature-Paketen auf die richtige Weise
Bitte beachten Sie, dass Microsoft das Hinzufügen von Funktionen zum System nur unterstützt, wenn es offline ist.
Das bedeutet, dass Sie von der POSReady 7 Setup-DVD booten und von dort aus Funktionen hinzufügen sollten, während das Image nicht läuft.
Sie können auch DISMUI verwenden, aber da DISMUI das .NET Framework benötigt, um zu laufen, müssen Sie einmalig zusätzliche Vorbereitungen treffen.
Erstellen einer portablen Version von DISMUI
Ich habe bereits beschrieben, wie man DISMUI mit Hilfe der Open-Source-Implementierung von .NET namens Mono portabel macht. Hier ist eine angepasste Anleitung speziell für POSReady 7:
- Rufen Sie http://www.go-mono.com/mono-downloads/download.html auf und laden Sie die Windows-Version herunter.
- Führen Sie die heruntergeladene Setup-Datei auf einem Entwicklungsrechner aus.
- Kopieren Sie den Installationsordner, der das Mono Framework enthält, auf ein USB-Laufwerk.
- Laden Sie die neueste Version von DISMUI herunter (1.4.1 oder neuer)
- DISMUI auf ein USB-Laufwerk kopieren
- Erstellen Sie eine Batchdatei oder eine Verknüpfung zur Ausführung des folgenden Befehls
"MonoDirectory"\bin\mono "DISMUIDirectory\DISMUI.exe"
Verwendung des portablen DISMUI innerhalb der POSReady 7 Einrichtung
Sie können nun den USB-Stick mit DISMUI und Mono verwenden, um das Tool innerhalb der POSReady 7 Setup-Umgebung zu starten.
Booten Sie dazu Ihre POSReady 7 Setup-DVD und drücken Sie jederzeit Shift+F10.
Navigieren Sie zu Ihrem USB-Stick und starten Sie die zuvor erstellte Batchdatei oder Verknüpfung.
Wählen Sie in DISMUI die Option "Offline" und geben Sie den Pfad zu Ihrem POSReady 7 Image ein.
Jetzt können Sie ganz einfach Funktionen hinzufügen, indem Sie dem Assistenten folgen.
