


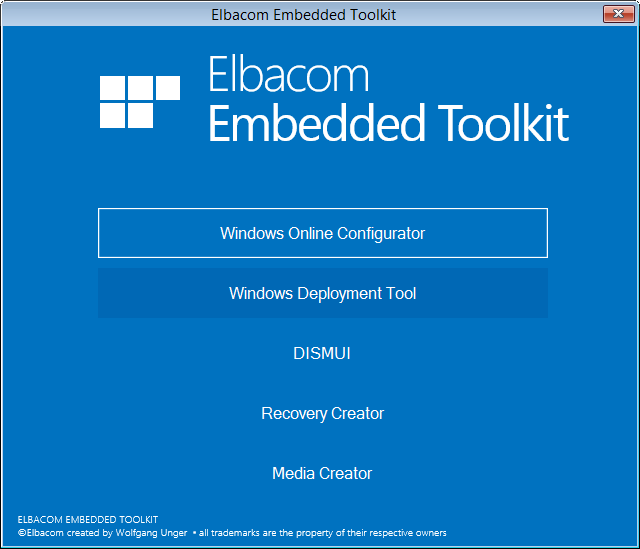
Windows Online Configurator
Windows Online Configurator allows you to your Windows Embedded images directly on your target hardware, by using an advanced setup experience.
It allows you to fully customize Windows 10 IoT Enterprise 2016 LTSB, Windows 10 IoT Enterprise 2016 CBB, Windows 10 IoT Enterprise 2015 LTSB, Windows Embedded 8.1 Industry Pro and Windows Embedded POSReady 7 prior the installation and also enhanced the experience for Windows Embedded Standard 7 and Windows Embedded 8 Standard.
The most important features are listed below:
Supported Products
How It Works
Windows Online Configurator is designed to run on your target device and allows you to install an embedded operating system from there.
Getting Started
To start the installation of an embedded operating system, insert the setup media (IBW or OPK setup disc) into your target device and also insert the Elbacom Embedded Toolkit (USB or DVD). Then boot your target device from the Elbacom Embedded Toolkit.
Select “Windows Online Configurator” from the Launcher.
Windows Online Configurator will automatically find the setup media and will start the installation wizard.
If the setup media is in a special path and cannot be located automatically, the follwing command line argument can be used:
WOC.exe -SetupMediaPath:
Installing Windows Embedded with Windows Online Configurator

The setup experience will look very similar to the original setup. However it will offer additional options that can be configured througout the process.
To begin, please read and accept both EULAs and click “Next”.
Depending on the operating system media, Windows Online Configurator will display various templates to choose from.
Additional or custom templates can be stored in the EET\Tools\WOC\Templates\ directory.
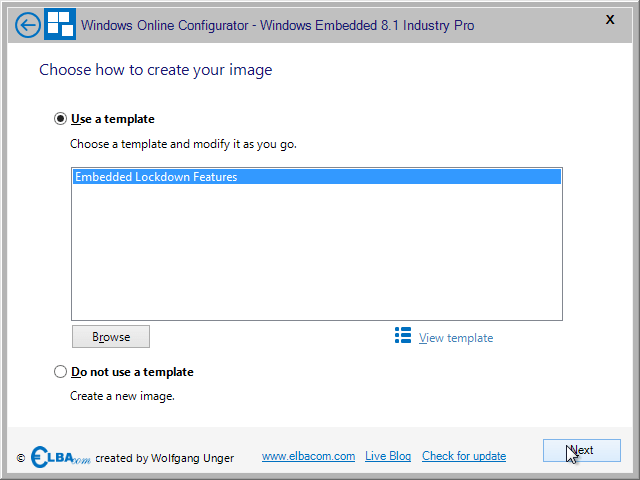
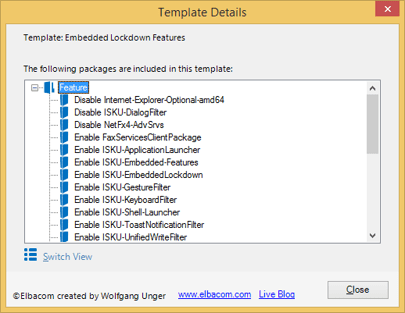
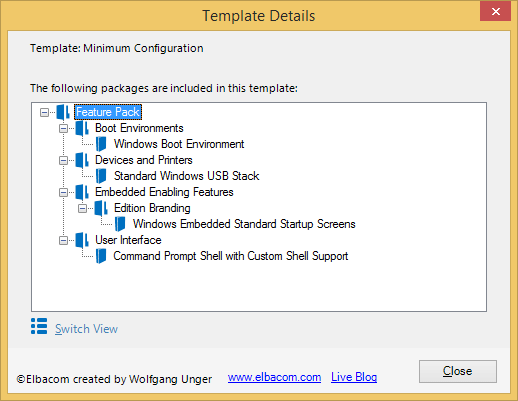
To view the details of a selected template, click on “View template”.
To continue, either select a template or select “Do not use a template” and click “Next”.
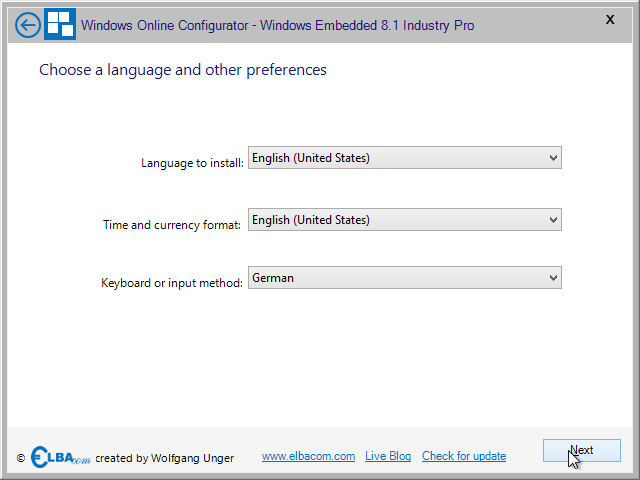
Please choose the default language for the operating system and select the keyboard layou and time zone settings. Then click on “Next”.
Note: Additional languages can be added later on for Windows Embedded Standard products!
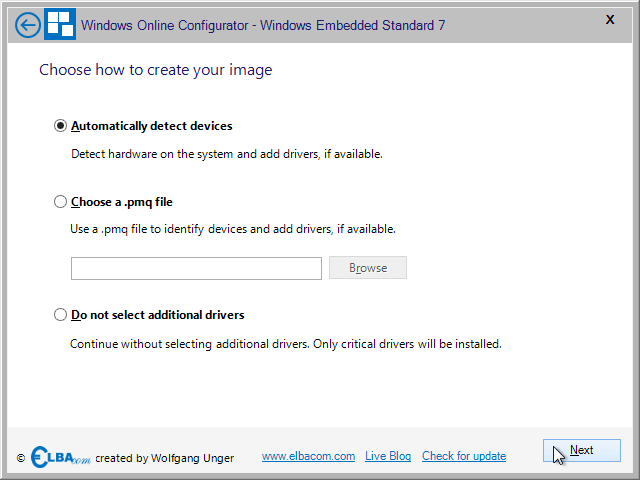
To install drivers, you can either choose to automatically detect the drivers of the currently running system, or you can import an PMQ file, that contains the hardware information of the target system.
To create a PMQ file, you can follow the steps described on MSDN (the procedure is quite similar in Windows Embedded 8 Standard):
http://msdn.microsoft.com/en-US/library/ff794097(v=winembedded.60).aspx
You can also choose, to not include any additional drivers.
Make your selection and click “Next”.
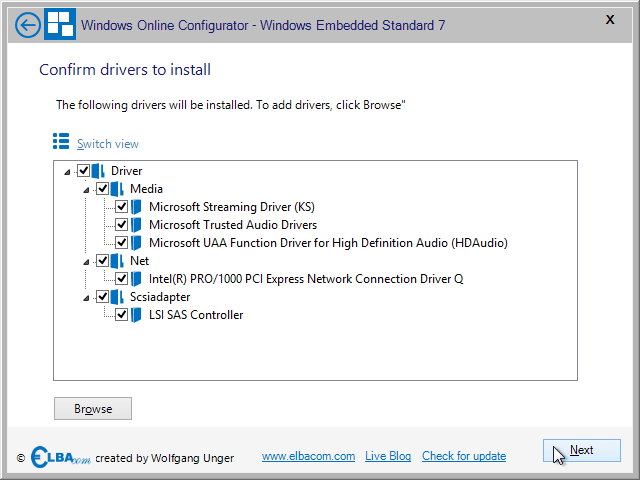
If you haven’t selected “Do not select additional drivers”, then Windows Online Configurator will try to find the required drivers automatically.
In case that some drivers are not included on the setup media, you can use the “Browse” button to include them manually. To do so you will need the extracted driver and browse for the INF file.
Once done, click “Next”.
Select the features that should be included in the resulting Windows installation.
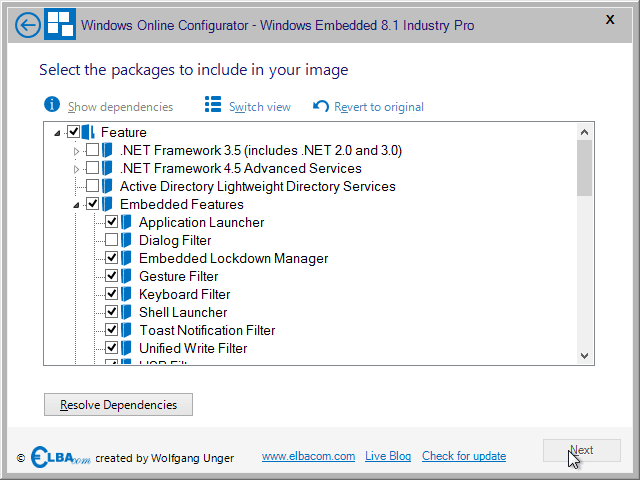
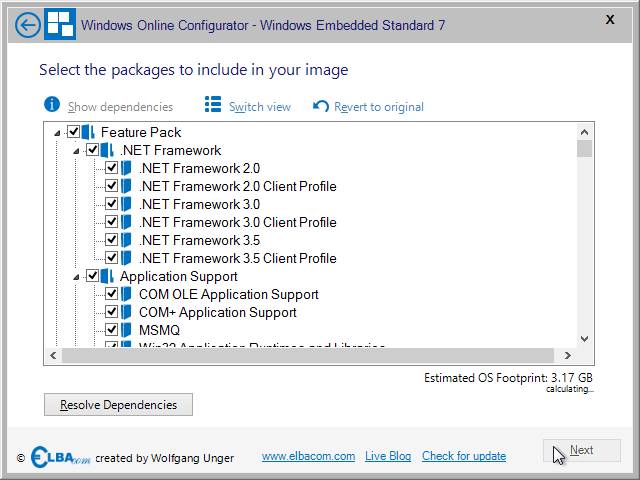
On the lower right you will find an estimation of the images footprint (except for Windows Embedded 8.1 Industry).
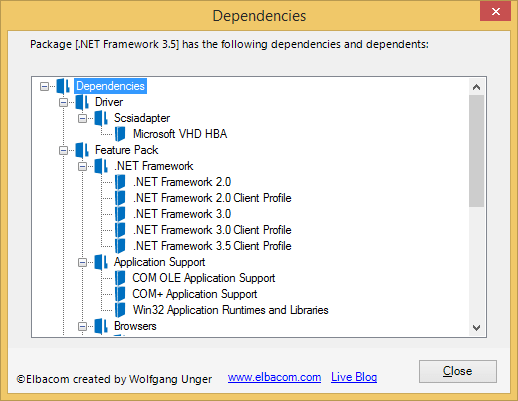
Double click a component or click on “Show dependencies” to open the dependency tree viewer. It will show the dependencies of a component and also the dependents, meaning all components that require this component.
After finishing your selection, click on “Resolve Dependencies”.
Solve possible conflicts by following the instructions in the conflict dialog.

If everything has been resolved, click on “Next”.
Now you can configure the user name and computer name. Click “Next”.

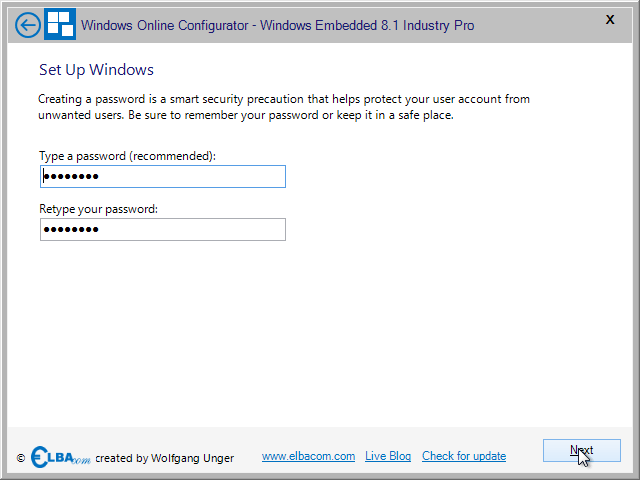
You can create a password if you like. Then click “Next”.
Please enter the product key for the product you are installing. Windows Online Configurator will validate the key and display the result. Then click “Next”.

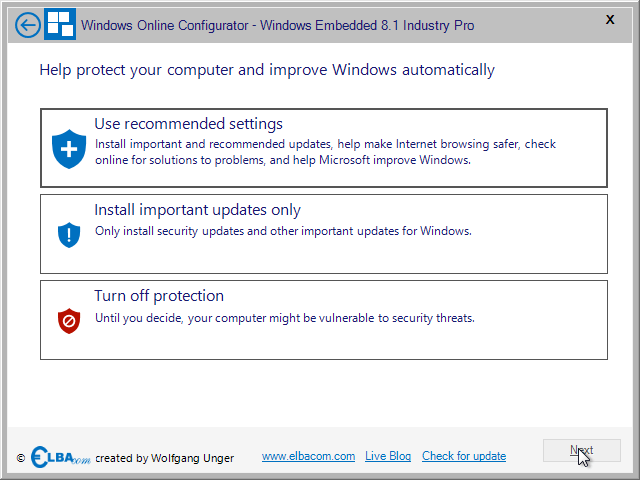
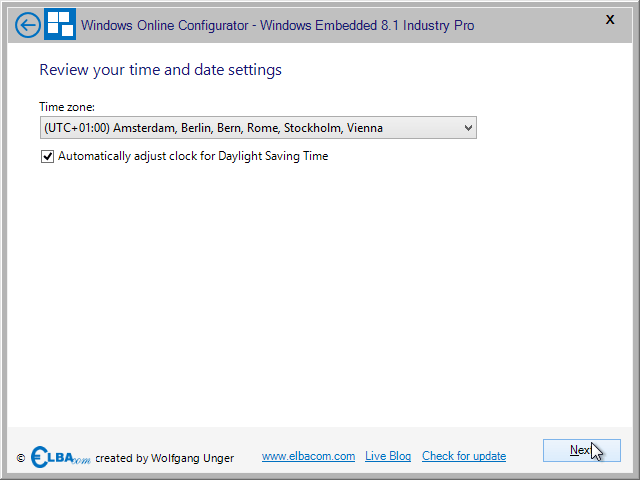
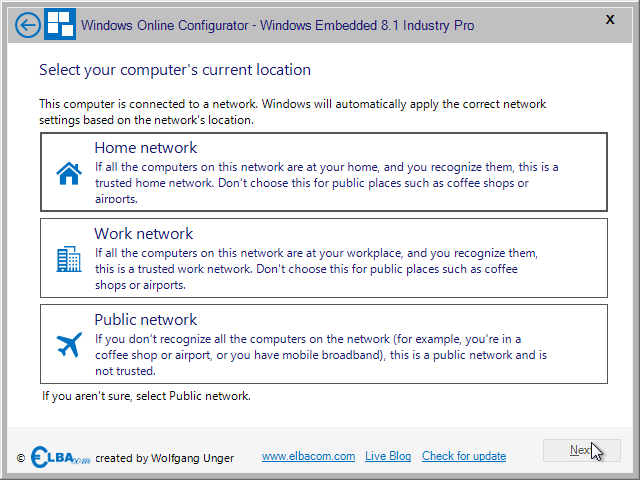
Please also configure the update settings, time zone and select the network location for the firewall settings.
Windows Online Configurator will show you a summary of your configuration. Please check it and click “Next”.

Please select the target drive, where you wish to install the image to. You can either connect the storage media of your target device to your pc and install directly to it. Or you can create a virtual hard disk (VHD) and install to it.
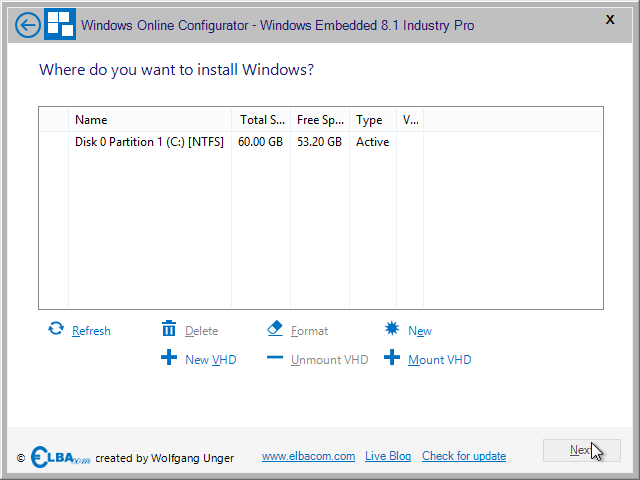
To create a VHD, click “New VHD”. Then select if you want to create a VHD with a fixed size (the maximum space entered will be fully allocated), or if you want to create an expandable VHD (the file will grow depending on its content).
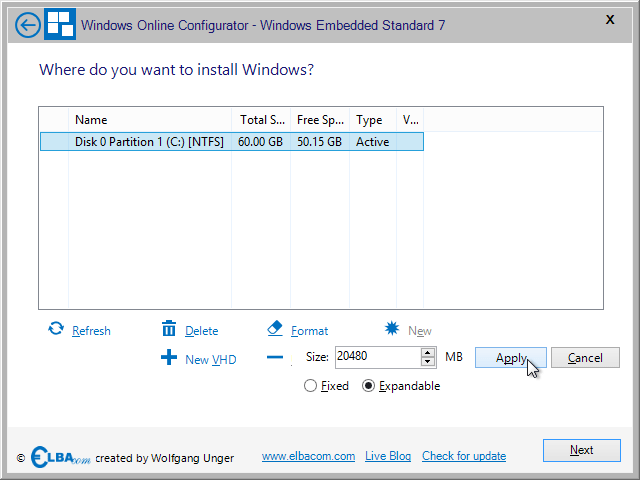
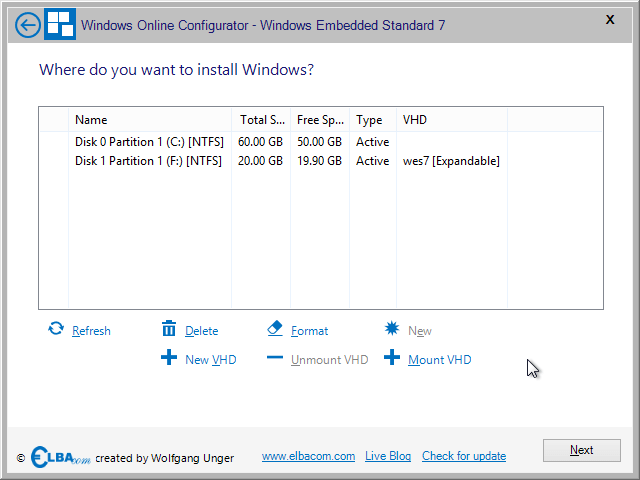
Select the target drive and click “Next”.
Windows Online Configurator will now build the Windows image according to you selections. Please wait for it to finish.
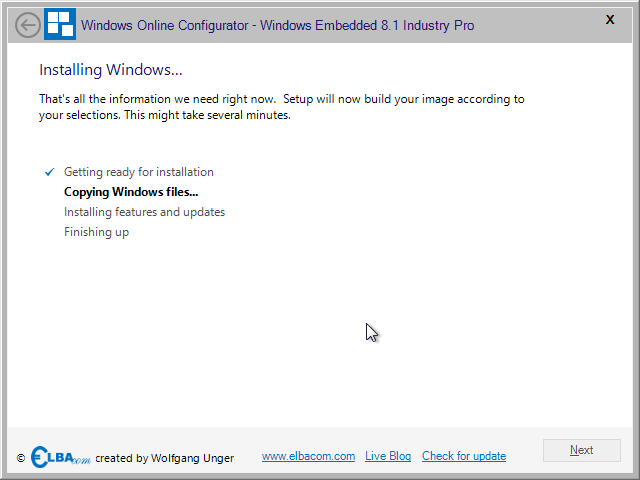
Once the setup finishes it will restart automatically after 20 seconds. You can initiate the reboot immediately by clicking “Restart now”.
