Recovery Creator
Recovery Creator allows you to create your customized recovery media within a few minutes. It allows to easily restore your own recovery image while the Recovery Wizard, that is running on the customers target will show your logos, your texts, etc.!
Supported Products
How It Works
Recovery Creator should be started on your development machine. It is a wizard that allows you to create a new recovery media within a few minutes.
Getting Started
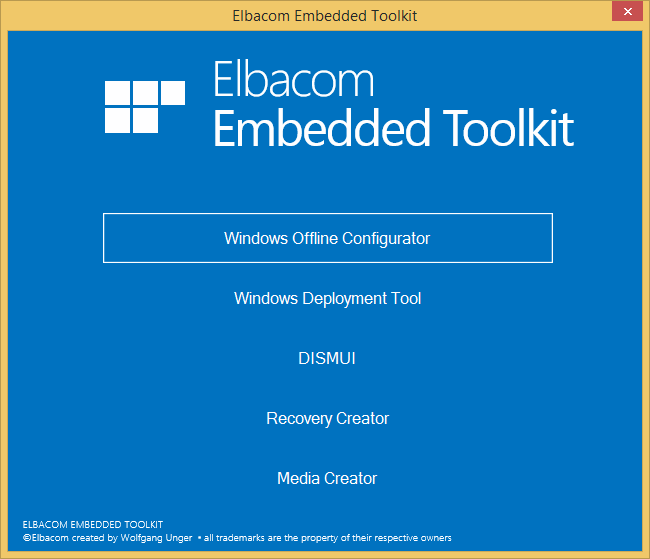
Launch the Elbacom Embedded Toolkit Launcher.
Select “Recovery Creator”.
Creating a new recovery project
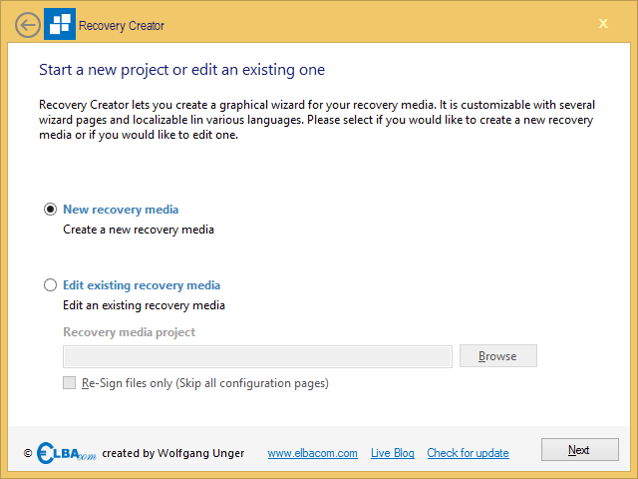
Select “New recovery media” and click “Next”.
Now you can choose which recovery wizard pages the end user should see.
Language Selection – This wizard page shows a selection for the available languages. Selecting one will translate the complete UI to the chosen language.
Welcome – A welcome screen that shows the texts specified in the language file.
EULA – Show the specified EULA and requires the user to accept it before he can continue.
Confirm Disk Wipe – A screen that informs the user that his hard drive will be wiped completely. He needs to accept this prior being able to continue.
Please also select the recovery image file, that contains the image(s) you want to restore.
Then click “Next”.

Select all the images you wish to restore from your WIM file.
If the recovery image has been created with the Windows Deployment Tool, you will have the option to use the stored layout, which means that the recovery tool will automatically recreate the original layout of the disk as it was on your master device.
In case you would like to manually create the partitions, or would like to create additional volumes and write a boot manager not included in the image, then choose “Use custom layout”.
Click “Next”.

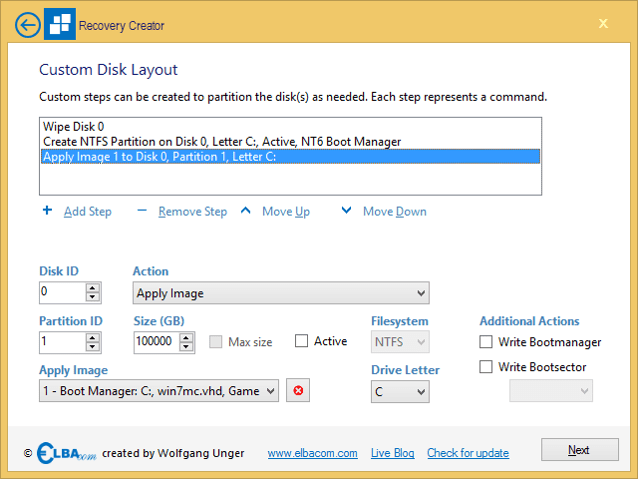
In case you have chosen “Use custom layout”, you will get to this screen.
Here you can add disk preparation steps, that allow you to create your custom disk layout.
To add a new step, click on “Add Step”. You can also reorder the steps by using the “Move Up” and “Move Down” buttons. To delete a step, chose “Remove Step”.
A step can do different tasks:
Wipe Disk – Wipe a disk completely
Create Partition – Create a new primary partition on a disk
Format Partition – Formats a selected partition
Apply Image – Apply an image to a selected disk and partition
Depending on the selected action, you can configure different settings:
DiskID – specifies which disk should be used for the step
PartitionID – specifies which partition should be used on the selected disk for this step
Size (GB) – specifies the size for a new partition
Max size – uses the maximum available size for a new partition
Active – marks the partition as active
Filesystem – selects the file system that should be used wehn formatting the partition
Drive Letter – assigns the volume the given drive letter (Note: the drive letter may change once the system boots up.)
Write Bootmanager – Writes the NT6 boot manager to the partition
Write Bootsector – Writes either an NT5 or NT6 boot sector to the partition
Apply Image – specifies which image should be applied to the selected partition on the selected disk
Click “Next”.
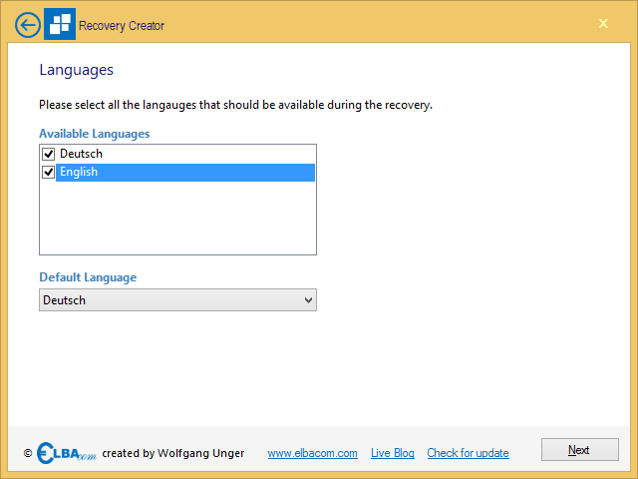
Select all languages that should be available during the recovery.
Please also select the default language that should be used.
Please note, that if you only include one language, the “Language Selection” page will not show up during the recovery.
Click “Next”.
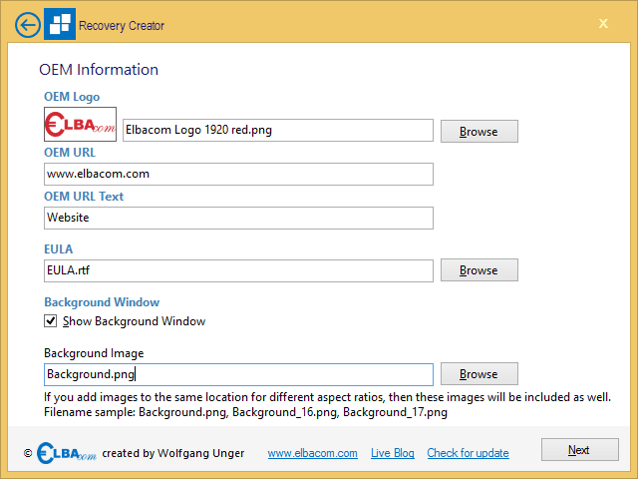
Please insert your company logo by using the “Browse” button or by entering its path.
Please also specify the URL that will be shown if a user clicks on the hyperlink on the bottom of the recovery window (similar to the ones displayed in the screenshots here).
Enter a text for the hyperlink that is shown on the bottom of the window.
Select an EULA file (must be RTF), that a user must accept during the recovery process.
You can choose to show a custom background during the recovery. If you would like to show it select “Show Background Window”.
If you use the background windows, you can select a background graphics. Select the file by using the browse button.
To display the background graphics on different screen sizes in the best way possible, the Recovery Wizard supports using different files for different screen ratios.
To use a differnt background for a different ratio use the following naming convention:
_.
for example
Background_13.png for 4:3 displays
Background_17.png for 16:9 display
etc.
If you use different background for different ratios, please create one default background without the ratio extension in the filename (e.g. Background.png). Copy all of these graphics into the same directory and select the default file in the Recovery Creator. The tool will then use all files, including the one for the different ratios.
Click “Next”.
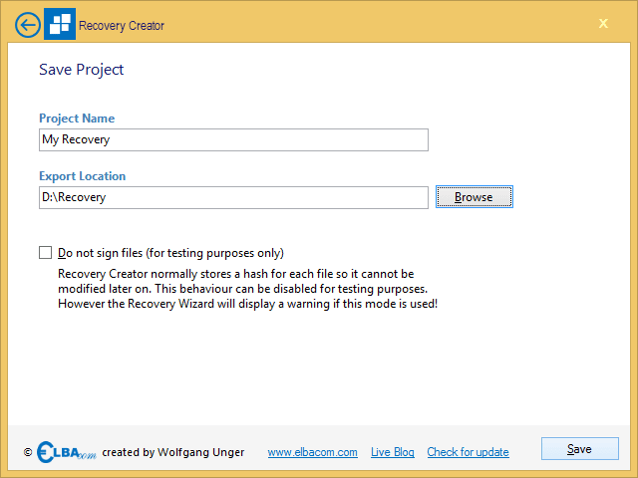
Please specify a name for the recovery project and also specify an output folder.
Recovery Creator will create a subfolder in the “Export Location” with the “Project Name” specified. This folder will contain all files necessary for the recovery.
However the exported folder alone cannot be used for a recovery yet. Please use the Media Creator to put it to a bootable media.
Signing
When creating the recovery project, Recovery Creator will sign all files used by the recovery project. This prevents anyone from changing files lateron. If a file changes (e.g. the recovery image will be changes, or a graphic will be replaced), then the Recovery Wizard will not run and notify the user.
This is a security measure to prevent tampering with the recovery media. Only you can change your recovery media to update them with a new image, etc.
However for testing purposes it may be useful to temporary disable this protection. If you would like to do so, please check the “Do not sign files (for testing purposes only)” box.
Please note, that by doing so, the Recovery Wizard will display a red warning, that it is running in test mode and it mustn’t be shipped like that!
To quickly update the signature of your project, you can check the “Re-Sign Files only” checkbox when reopening your project.
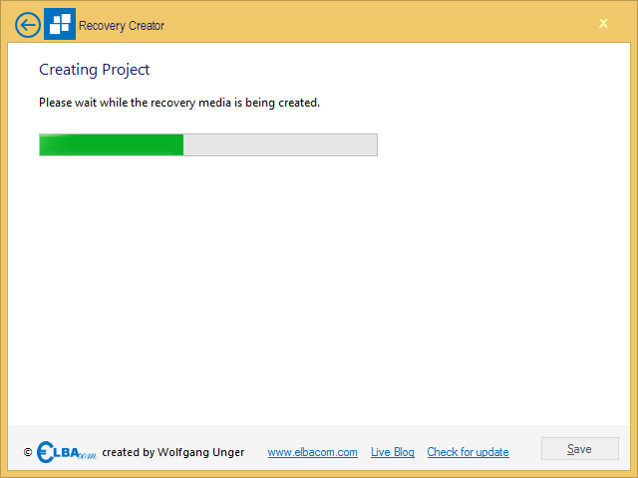
Please wait, while Recovery Creator copies all files for the Recovery Wizard.
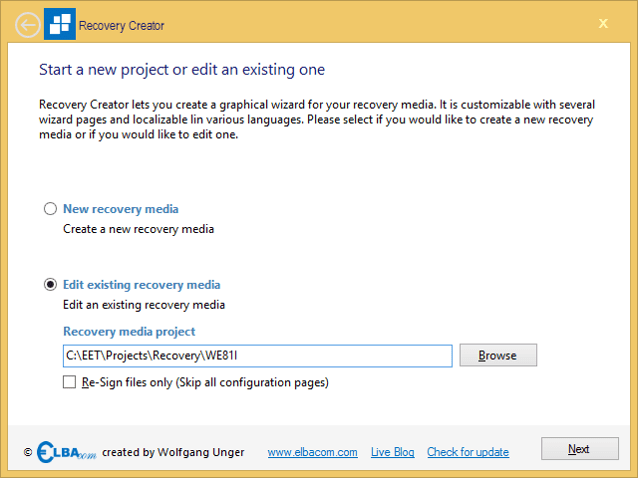
Edit an existing recovery project
To edit an existing project, select “Edit existing recovery media”.
Then browse for your recovery project.
Check the “Re-Sign files only” checkbox if you have just modified files in your project and you do not want to modify anything else.
By doing so you will skip all of the configuration pages and get directly to the save page.
For more details regarding signing have a look above in the Signing section.