XP Embedded Builder is a tool which allows you to create your XP Embedded images directly on the target hardware without any knowledge in Target Designer.
The interface is like an XP Professional setup – you boot from DVD and a setup wizard will lead you through the installation.
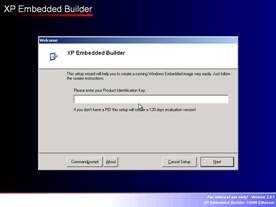
At the beginning you can enter the product key to create a full version XP Embedded image.
You’ll get your product key together with your license package. If you leave the field blank, the XPeBuilder will create an 120-day evaluation version.
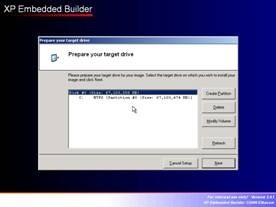
The next step allows you to prepare your target disk drive. You can create, delete and modify partitions to build the environment you need for your application. To easily prepare a whole disk drive you can just select the disk and click “Next” – the XP Embedded Builder will then create a single primary partition on the selected drive and will format it with NTFS filesystem.
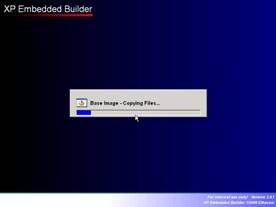
After the preperation is done, the setup will copy a basic XP Embedded image to the destination drive. This is a small XP Embedded image which contains only basic functionality (footprint is lower than 100MB). This image is the base for all further customizations. From now on it’s up to you to select the components you wish to add to the XP Embedded image.
The XPeBuilder offers 50 components at the moment and there will be more available from time to time.
A component in XPeBuilder is more like a macro component in Target Designer because it already contains all needed files and dependencies.
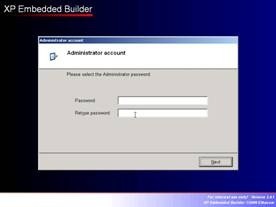
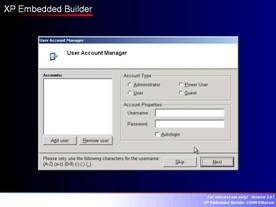
Now you can specify a password for your administrator account. In the next setup screen you can create user accounts and give them the appropriate rights. You can even specify an automatic logon here.
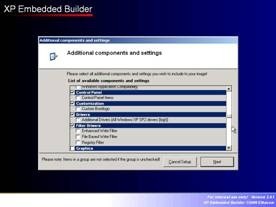
The next setup screen will show you a list of all available components which are combined in groups.
To install a component just check it. If you click “Next” the XPeBuilder will check the dependencies of you selection and will add the missing components automatically. It will also check for conflicts and display you which components cannot be added together. If there is no conflict, XPeBuilder will begin with the component installation. Some components require further configuration – these components will display their own configuration windows.

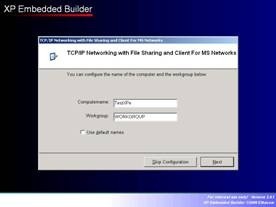
For example the “Control Panel Items” component lets you select each control panel entry that should be added. The “Network” component will let you specify the computername and workgroup for the device. Or the “Language Pack” component lets you specify which language packs you want to install and lets you configure a default language.
After all components have been installed the XP Embedded Builder will do it’s final work and reboot the system.

Now the First Boot Agent will startup to finish the image configuration. When it’s done you can finish your XP Embedded image by installing additional driver, applications and so on as on XP Professional.