DISMUI also works with the Windows Embedded POSReady 7 Community Technical Preview. So you can easily use the tool as a graphical wrapper to activate and deactivate Windows Features. However there are a few things needed to make it work.
Here is a description which things need to be changed and why:
- Creating a Distribution Share directory structure
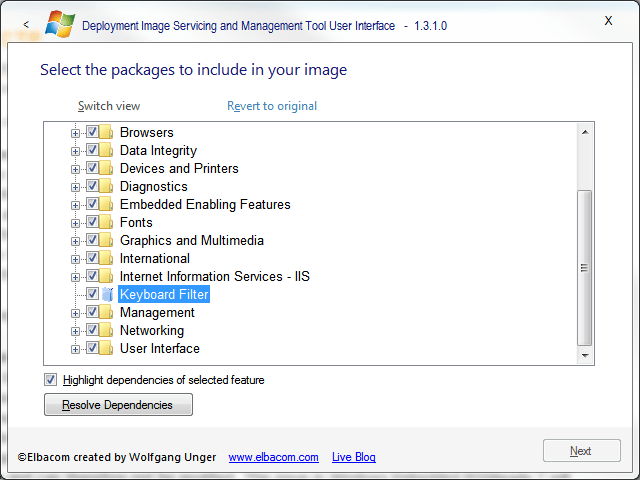
The current version DISMUI only searches for packages in a valid distribution share folder structure.
This means that there should be specific subfolders in which the packages are located.
However the POSReady 7 CTP DVD contains all feature packages in a flat DS folder.
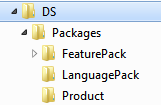
To make it work with DISMUI create a new “DS” folder for example on a USB drive. Then create a subfolder named “Packages”. In it create the following subfolders “FeaturePack”, “Product” and “LanguagePack”. Copy all cab files from the DS folder of the POSReady 7 CTP DVD to the “FeaturePack” folder.
After that DISMUI will recognize all the packages and will work properly. - Removing the Windows Boot Environment component
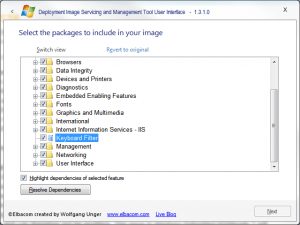 Unfortunately the POSReady 7 CTP has both boot environments included in the image which will cause DISMUI to show a conflict between those two feature packages. The reason for this is that there must be only one boot environment included in the image as they are marked as conflict in the base image. Therefore DISMUI is correct in showing a conflict.To resolve this issue remove the “Windows Boot Environment” component from the distribution share. To do this just delete the file named “winemb-bootenv.cab” from the DS\Packages\FeaturePack folder. After that DISMUI will only display the “Enhanced Write Filter Boot Environment” and it will not display a collision because the colliding component is not there and can therefore not be modified.